This guide gives your Mac a complete safety net: Time Machine for an automatic local backup, plus iCloud for the off-site copy. Together that's the 3-2-1 setup from Why backups matter — and on a Mac it's genuinely easy.
What you'll need
- An external drive whose connector matches the USB port on your Mac — the small oval USB-C / Thunderbolt, or the older rectangular USB-A. Not sure which you have? Call me for a quick answer.
- Ideally, the drive should be at least as large as your Mac's storage — bigger is better.
- A few minutes, and your Apple Account password for the iCloud part.
Part 1 — Turn on Time Machine (your local backup)
Connect your external drive
Plug it into your Mac. If macOS asks whether you'd like to use it to back up with Time Machine, you can say yes — or just follow the steps below. Many drives come formatted to work with both Mac and PC, so your Mac may tell you it needs to reformat (erase) the drive first. That's normal — if it asks, say yes and it will set the drive up correctly. Just be sure the drive is empty or has nothing you still need on it, because reformatting wipes it.
Open Time Machine settings
Apple menu →
System Settings→General→Time Machine. (On older macOS it'sSystem Preferences → Time Machine.)Add your backup disk
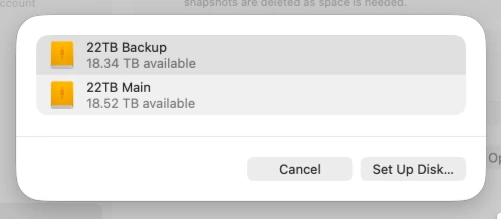
Click
Add Backup Diskand choose your external drive. Turn on Encrypt Backups (recommended) and set a password you'll remember — without it, an encrypted backup can't be restored.Let it run
Time Machine now backs up automatically, about once an hour, in the background. The first backup can take a while; after that they're quick. Your local copy is done.
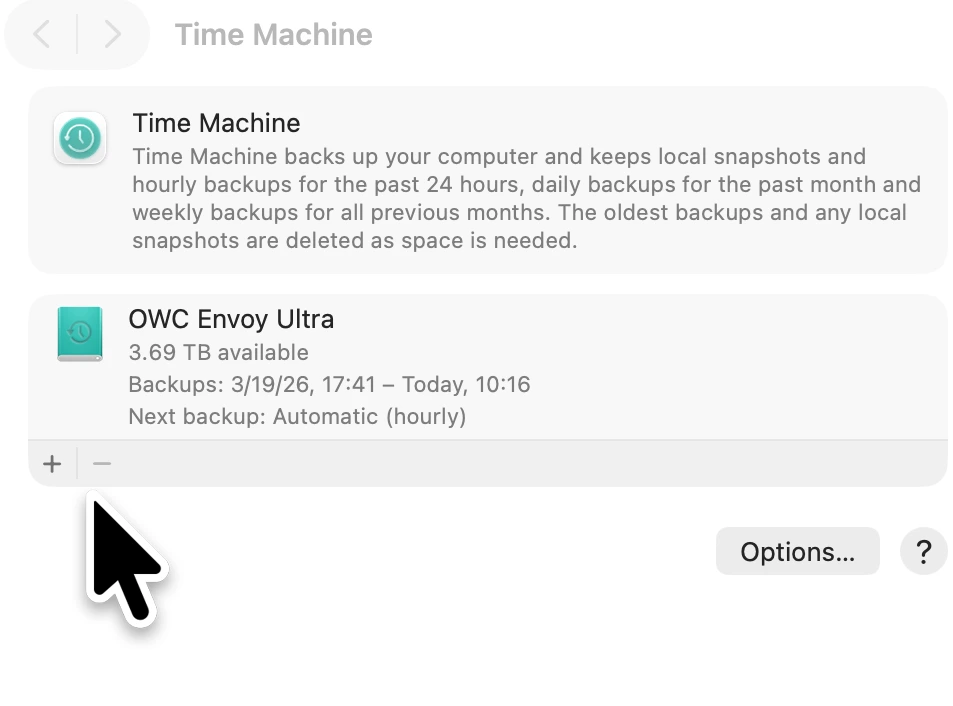
The #1 thing that goes wrong: keep the drive connected and visible. Time Machine can only back up while the drive is plugged in and mounted (showing on your Mac). Two traps I see constantly: (1) the drive is set not to appear, so you can't tell if it's mounted — open Finder → Settings → General (older macOS: Finder → Preferences) and tick External disks (and Hard disks) under "Show these items on the desktop," so the drive shows up when it's connected; and (2) the drive only gets plugged in now and then. Your backup is only as current as the last time the drive was connected — so for real protection, leave it connected all the time. And remember Time Machine can only run while the computer is actually turned on — a Mac that's shut down isn't being backed up, so don't count on it catching up overnight if you power down. If a backup is skipped, Time Machine usually warns you, but those warnings are easy to miss.
Tip — give the drive a name you'll recognize. You can name a drive anything you like before adding it (in Finder, click the drive's name and type a new one). If you keep several drives plugged in, a clear name — or even a label written right on the drive — saves you guessing which one is your backup. I actually leave mine named for the drive itself (like "OWC Envoy Ultra") so I can spot it at a glance. One catch: if you rename the drive after it's set up, Time Machine can lose track of it, so you may need to re-select it in Time Machine settings.
Part 2 — Turn on iCloud (your off-site copy)
Open iCloud settings
System Settings→ click your name at the top →iCloud.Turn on iCloud Drive
Enable iCloud Drive, then turn on Desktop & Documents Folders so everything on your Desktop and in Documents is kept safely off-site automatically.
Check your storage
The free tier is only 5 GB — usually not enough for real coverage. A low-cost iCloud+ plan gives you room for everything. Not sure which size? I'm happy to help you choose.
Work with special design or project files? Some Mac files are really a bundle of many files inside one icon, and certain cloud-sync tools can corrupt them. If that's you, don't rely on sync alone — keep a Time Machine copy too, and always confirm those files actually open after backing up (see the warning in Why backups matter).
Part 3 — Prove it works (restore a file)
This is the step that turns a "backup" into a real backup. Don't skip it.
Open Time Machine
Click the Time Machine icon in the menu bar →
Browse Time Machine Backups(or open the Time Machine app).Find a file and restore it
Use the timeline on the right to step back in time, select a file or folder, and click Restore.
Open it and confirm it works
Actually open the restored file and make sure it's complete and works — that's the only real proof. Do this when you first set up, and check again every so often.
Buying a new Mac? With a Time Machine backup, Apple's Migration Assistant moves your whole setup — files, apps, and settings — onto the new Mac in one step. It's one of the best reasons to keep Time Machine running.
Keep it healthy
Glance at the Time Machine icon now and then to confirm recent backups are happening, and keep the drive connected (or reconnect it regularly so backups stay current). Re-test a restore from time to time — backups can fail quietly, and a quick check is your early warning.
When the drive fills up. Eventually your backup drive may run out of room — how soon depends on how big it is. When that happens you've got a couple of good options (add a second drive so Time Machine keeps backing up to both, or start fresh if you no longer need the older history). Which one's right really depends on your situation, so when you see the "disk full" notice, just call me at 817-994-7111 and we'll pick the best fit together.
Want me to set it up?
If you'd rather not fuss with it, this is exactly the kind of thing I set up all the time — Time Machine, the right iCloud plan, and a genuinely safe routine — and I'll document how it's configured so you always know where your data lives. Just get in touch.